Show/Hide Toolbars


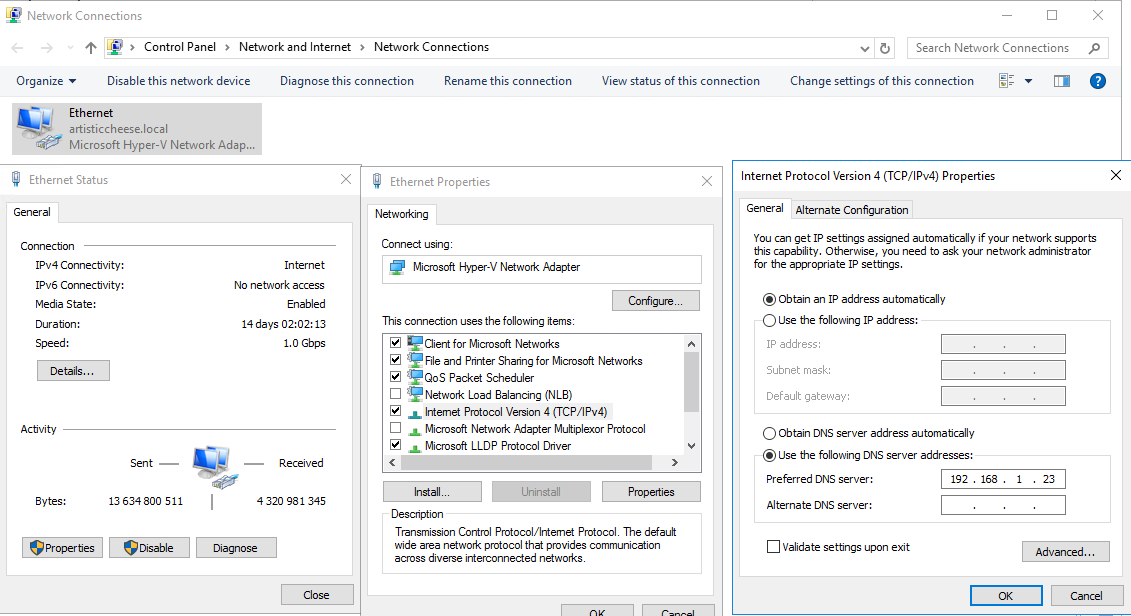
Add All Nodes to AD. Change DNS server addresses to your Active Directory Server ip address.
 

Y6hgaC2AR0nTXY9Ky77_awhDe6hCCks30D3hEsE1yyw-U7YIhwM1r8p9DVa9607cWq_iq3F4nOoMU_tl_YMvI7qtQjDs6Ryoi5PqO6eKKTrJVF_NN9Z6oXNfsusbhRpjX4nF2gtL


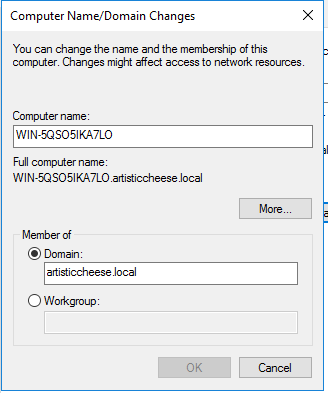
Add Node to Domain by changing “Member of” in Computer name tab of System Properties window.
 

ehg6K35n-kbW4iw7pWEf09PyhtOc34aHF0ZUSgCAlAgNi1LdDnKDjFGMY1ZEp0PAJB9Vl8_RKMBNQU4ovGZe1A2gnoG51xTTAnJQyxY8gVBLS41Pv3BnXqFSL0pmPwKJRhL7aujD


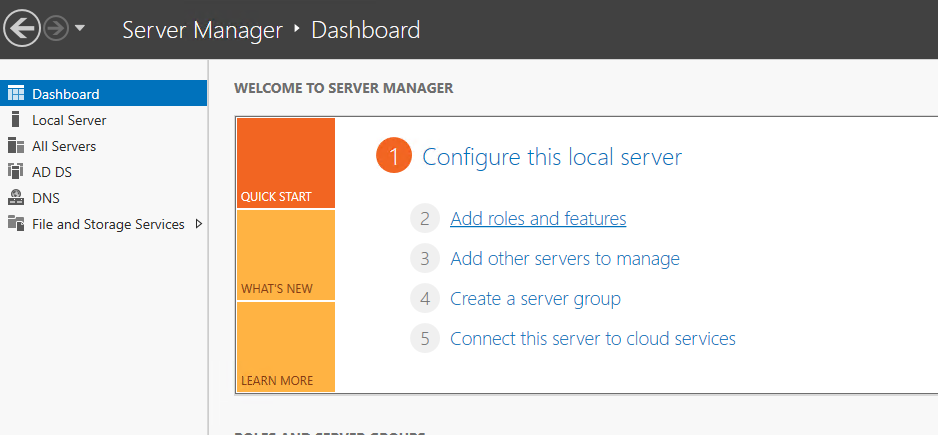
In the Server Manager > Dashboard, click Add roles and features.
 

OGCWoc7PjAgbxULNN_hRsXdPHBvuvU9BLz0Phd4uMhX7pJk6VJ2A-twIeqq4VYccHomBmKiOjeUxOprfphV_MfKUZsnemLNOcCqaDzj7mcUoNKHDPh48kFi2vlu9VwjKbG8yrl7T


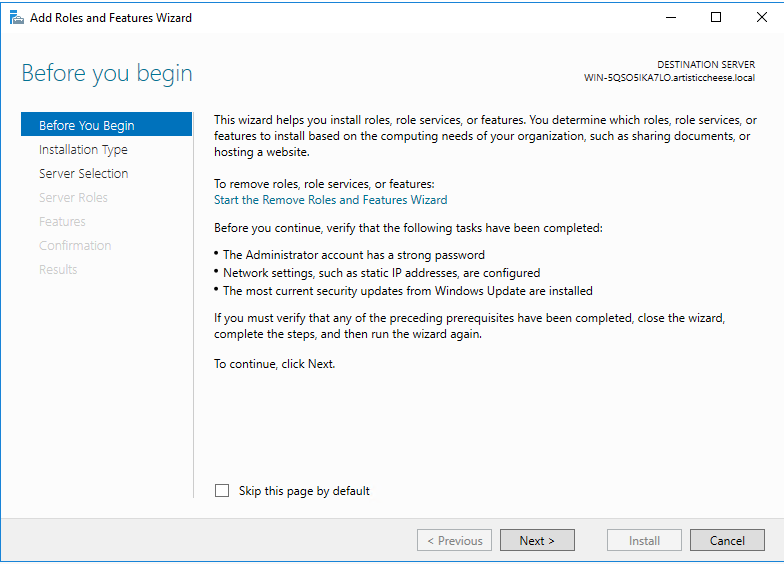
The Before you begin window is displayed. Click Next.
 

Drgge0dLPjMXkKxUQ8iCaoukbPW0hylROOq-KKTBtQUslQsZYa7P6u3OPzKLEboGG69_r5ln6MsjJqlFDHq14MGbWfKM7J1YXP4jA1Ny93IncOE1cveWcl6nJj3pvLYPsCz_1o3u


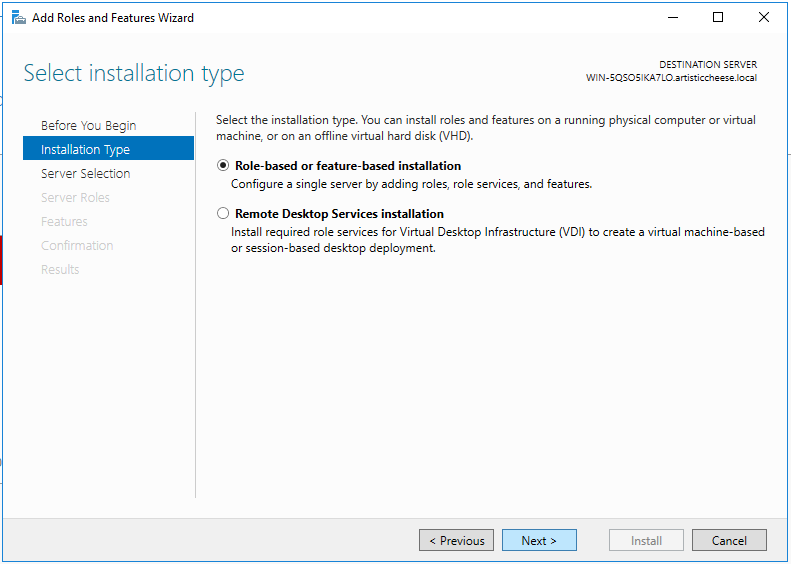
The Select installation type window is displayed. Select Role-based or feature-based installation. Click Next.
 

cTR60KH3Z25n-bt-YR3wuVajldliARR_Euu8t9vZMgOnGVgiwVBBGeFz9GKz8AxrrIxi-LGyGGiAAZuEVlvCndWf19VHIltdreYE0p4rNtKmpivuuayRBG7NP-eHErEFAtBj46yE


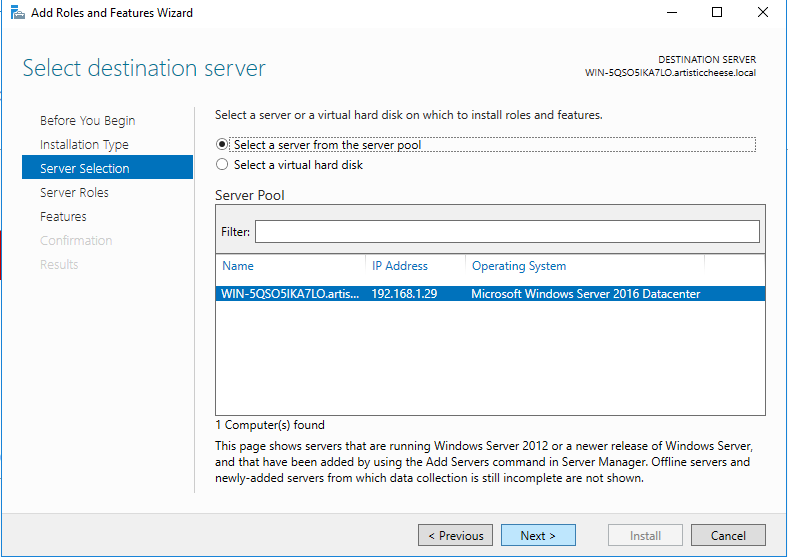
The Select destination server window is displayed. Select the server that you are logged in on. Click Next.
 

M7IEL2-wGE5wTYumrUEf0UmU2UNcnA-cHJ506kJ4gLgLJpwxADgzTC2R5o6RRHW58X7XB5U7eATDiEmaTZqJowylZarGF-s71AFo6iXnoBLJvKek28PNgT1TvIEqFupxF6vkimsI


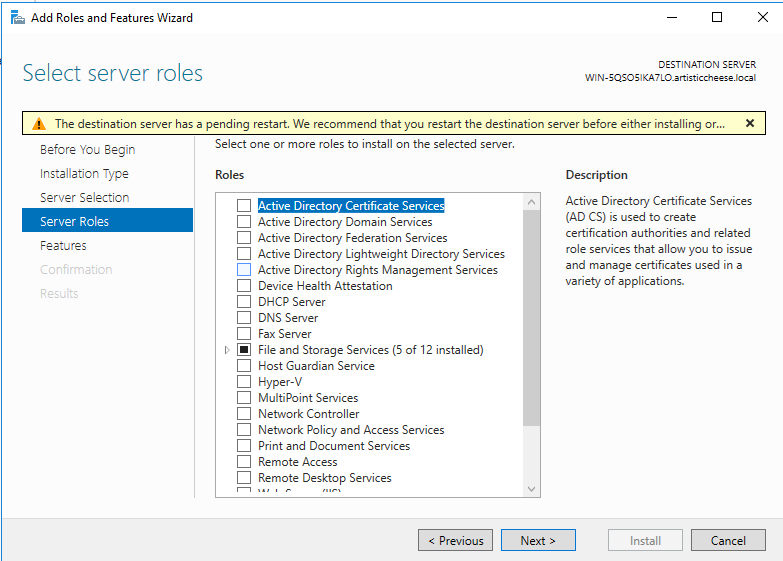
The Select server roles window is displayed.Click Next.
 

TdC5YSEtT3jTpb9Ai2AfSXOBVDhnQmnRO4t7THA37fxnD2e83-OIj-PMgmmFT2u4jS_jZKzqC175IY4sL52IxKrhZe6L21-2Ry9kITbZ_Hebh_AX_VcI2UdC8yXQ83UnUGLtAXjR


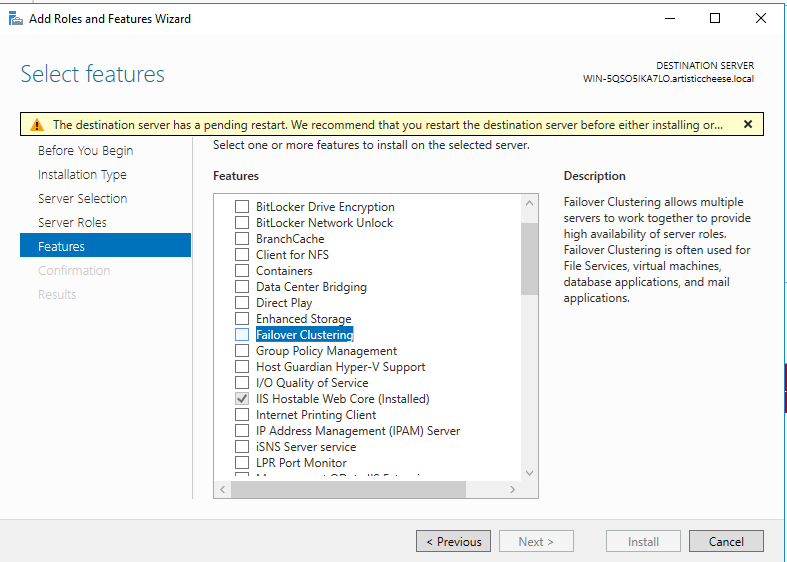
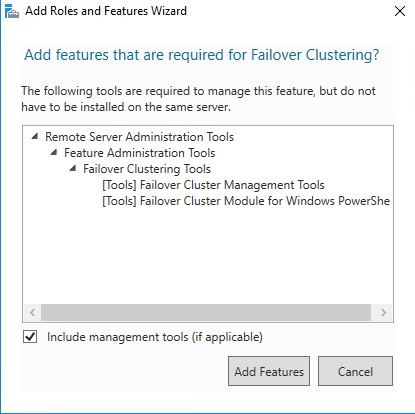
The Select features window is displayed. In the Features list, select Failover Clustering, Failover Clustering Tools. If it wasn’t installed before, the Add features that are required for Failover Clustering window will pop up. This window shows the dependencies that will be installed with this feature.
 

y5YLW6iBmjcCWgLo5JtcmSIpAGhhnshwOsE9sMvD3_I3QeH07dibne396We69uY-Yort4jOoAkYGMqSacTjMlk85SyGLYX_xdZNZVrJT6thIuggiLmXxofyof4u836oDc_LaQ9t7


SmH6vAytGOGcrxQ7aKldKZPHxJJKkI2tROZ2-4CDjZ0sWQW-mvDmgJgLx4E213bsXAkjQfE2bCzwaa-xRyBIr83q2mofl5_ncwsh0cU7KnFFh_CrmD8j2POWAs2JDbGWgiPXbCtG


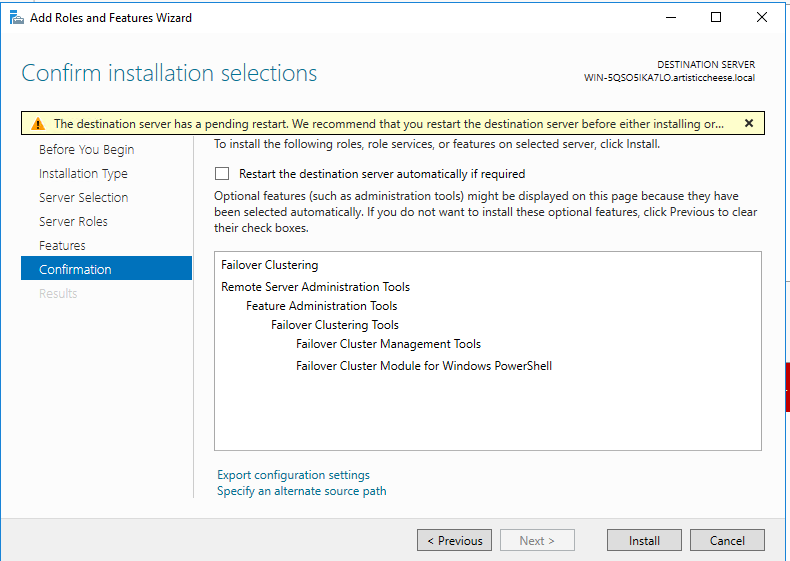
Click Add Features.Click Next. The Confirm installation selections window is displayed. Check the setting to ensure all selected items to be installed.
 

RzrruvyZy0Nvfj9xZcvaW13TcKpGTnONnj1vcgqKodkn6Z8RBrrNCSf6CJSwPEgOcOxpF8YTV1rVu7pWCFAfjGKsS-AdqDqOXKpEemTFV7zgPTGagEYHuH28wduS0-tVdwWjku98


Click Install.

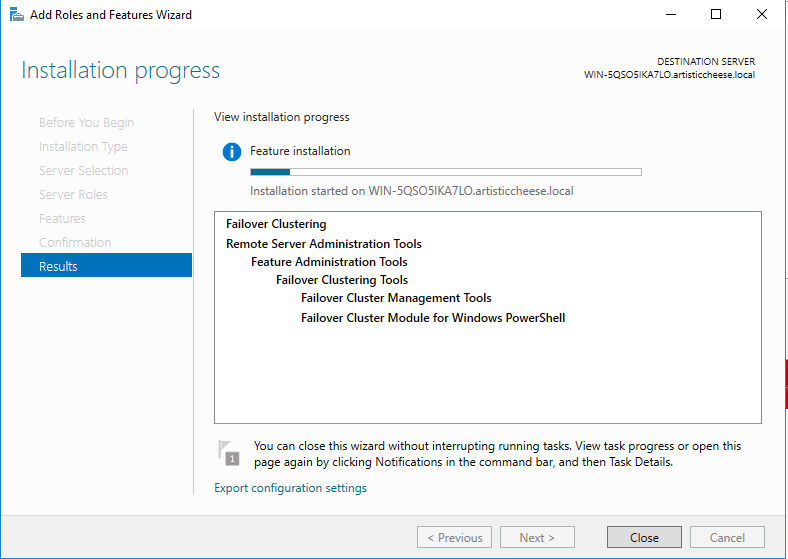
The chosen Role and Feature will be installed on your machine.
 

wRnfh8Q0Hz1ih1rmmhYPDZlhUYxFifrWhow9-69lZUZWBgKtva7Tkr_XouV-_XA713pdVuX49BO_Io1hHROjVCdy9X8UFezhJYMlSWXXpc2RHAWemua82JK54U1VCgW8UXklItyG

When the installation is complete, restart the machine to finalize the installation.