Show/Hide Toolbars


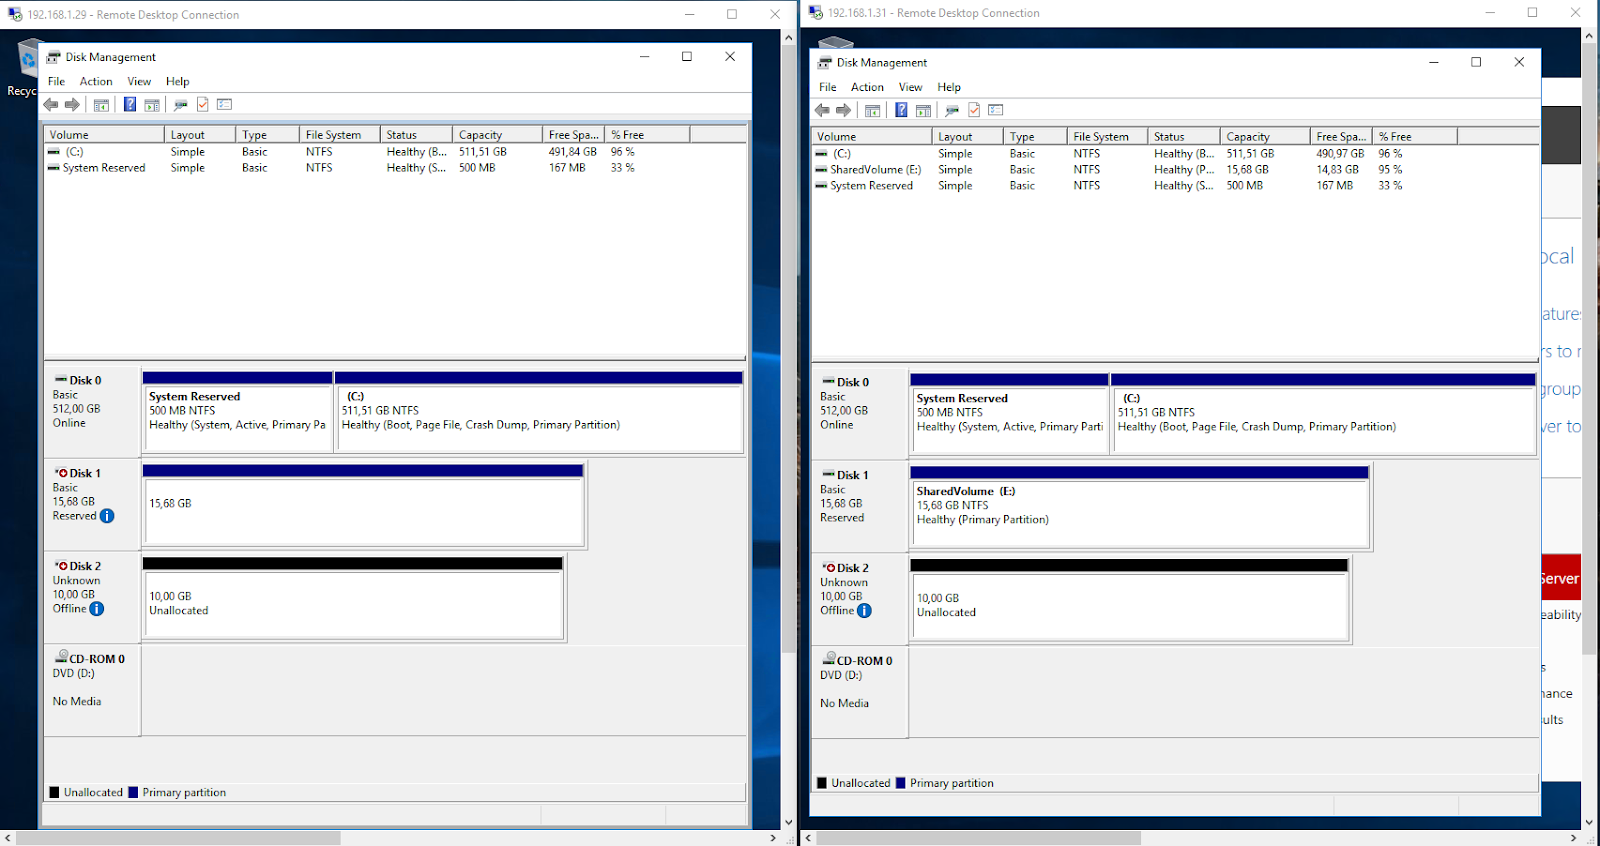
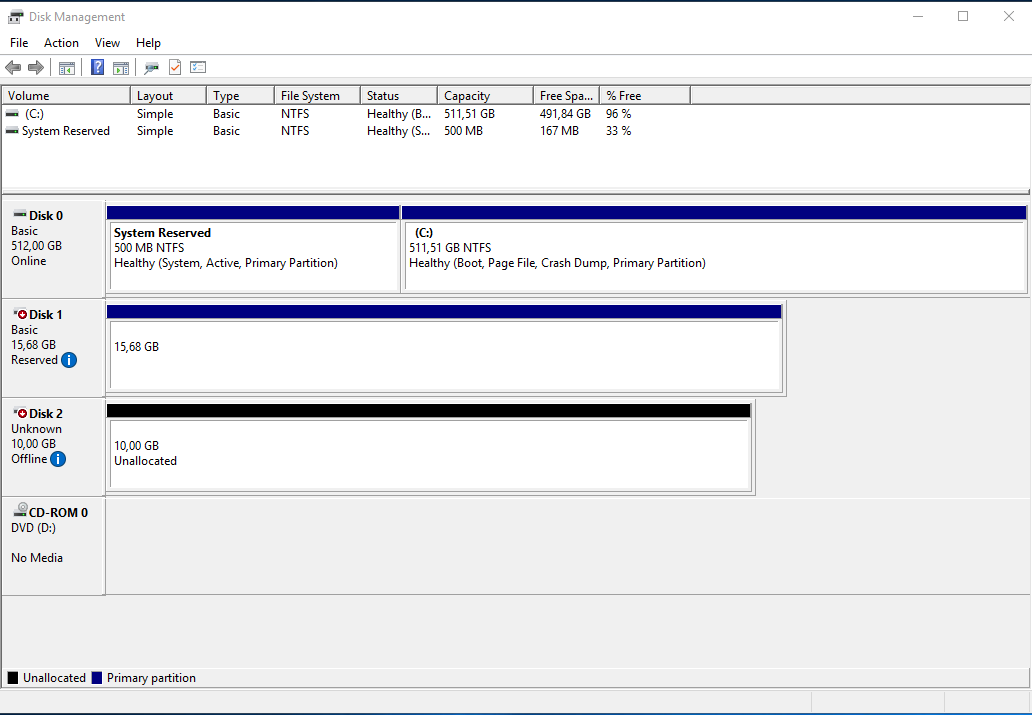
At now on both nodes new iSCSI shared drive is unallocated and offline
-HLDYOPgCl3kLeu-s4VGV_WUmtilptxCm-BRo5mB9tiZGr1VV7pffRaqBCZaB5SMKDvT2EaKseEgpxMr7pr6IbnZGmsu8DEN6hURBVwYPH3ICR-jb3dJ2U_Vgim2TgSgQclFmnRx

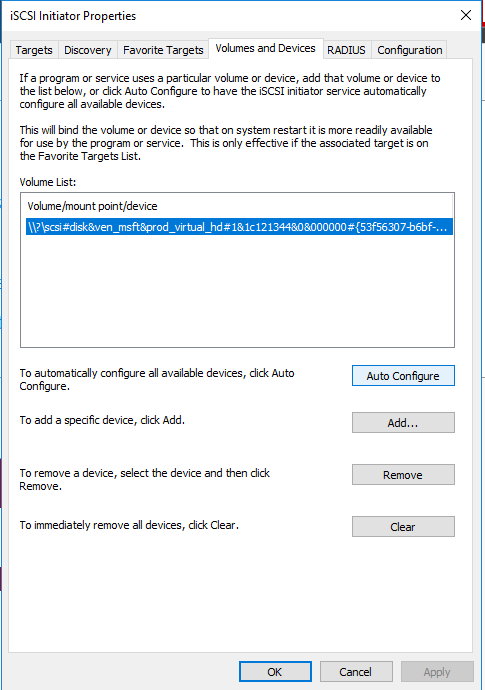
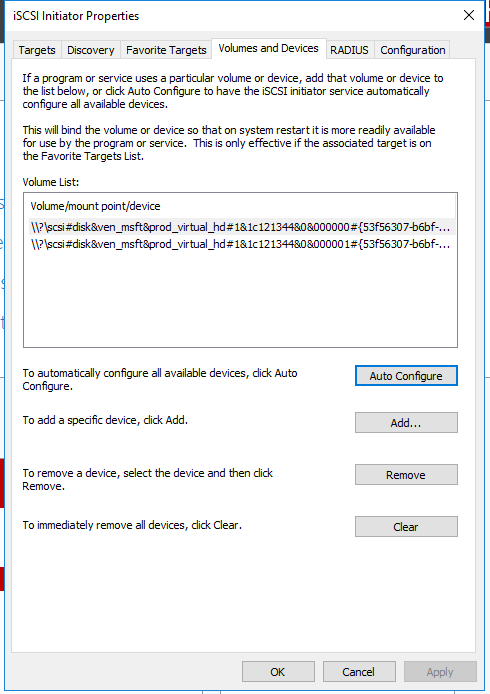
On both nodes you need to go to iSCSI Initiator Properties , to the Volumes and Drives tab.
1lZ8lEvyOrGCibLxuuMfcqGhaKbZL4LPBpMTCUa_zh1bI7wv5Kv6qHZj5Zkr1VJdZMsVbCCBPU88LrB81F83xI-O6vR0c7V0gGvWofLDzRIVGhGWEyua_SOEfMhrvAKYeM95FyV8

And click to Auto Configure button. Current node will update information about shared drive.
reTEyckEw_mSUFz4hUM5uRqKuzVIrFzU6hciSxS1H_FnWCjGwrerMKdH2uyyhsAanK-RxQKEf8AECdRkVtFOYYz7vTEG0zKHG6JoCjV6xwHAyXuoc1Tr3OpEv35LdhqlhtX8e4QH

After that you need to close this window by pressing OK button.


When you are connected on the first machine, click Start > WIndows Administrative tools > Computer Management > Disk Management.
NF8JWmZ6-p-DW_IwS-nRugElzeVVsI-4iWSbLl720pxjQ8vaRjBmbonKYtAaZDWHFLuAhAQCwSKHF8S8NUBRWJu9mO1EZvhL0uRz4EBCdRLayPMLUm7XzD7SoGI757Zx9uRgWfUO

Your disks appear as Unknown and Offline. They also display the size you configured on the SAN (eg: 10GB). You need to bring the disks online by Right-clicking the disk number  and selecting Online.

964WceRbHE_aJme98RVlXjToVhrmKLDhPOrSDwnRGKZlcMPOChCFdzUwwOF446m6LIHOjuKovobnLJL70zT-iQBsWFDmw3thMCIJS0UVQHyVIhg9zEEnvCzA3nCj3uZLgDRpwcUC

Initialize the disks:

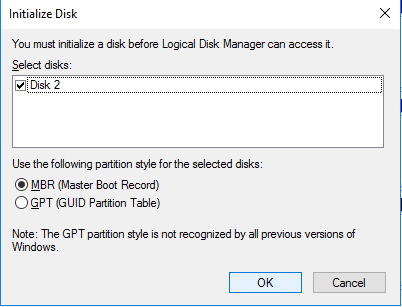
Right-click the disk number next to one of the new drives. Select Initialize disk.

In the box that appears, ensure that your new disk have a tick mark next to them.

kGR9EX0eeqN9dxemkbsiRZrNAkiUIeGnpAlDC5_iZfQw6vvgDZ0RiV9Tmxsm-NPpouCcGRIbFQ3zPkiLowLyAV9e3aHgFjh7Z-N6bKEXaF2Kn92JdDXvyjf5eYFk-rM-f2TarETl

Set as MBR.

6kFOmz6YO7c06qQD_oPtT_zshRuzdsYSkA_Ky9fXI6C6GsBnAvuP277SiZibFIqQoQDI4laioHEidT_Wyb9h4H6aDpCjkbOQw_HyjlV1lmVdQ7VQ8qU0GfkYX1IKl6jbRq3mrFJq

Click OK.

Configure the new drive. Right-click on the drive.

uqz7wOdk8_LonbqRF4ISiUoilwo07u64qH7ZeWoStVT18vE77OSFbdnNj1iTt1ojn4Weo-lpIBAUvZmQKoX8AUvh4mQJLIPrvSwuVYaUupJWq1otUh3PsthLLhpOCV7DnST9PHA6

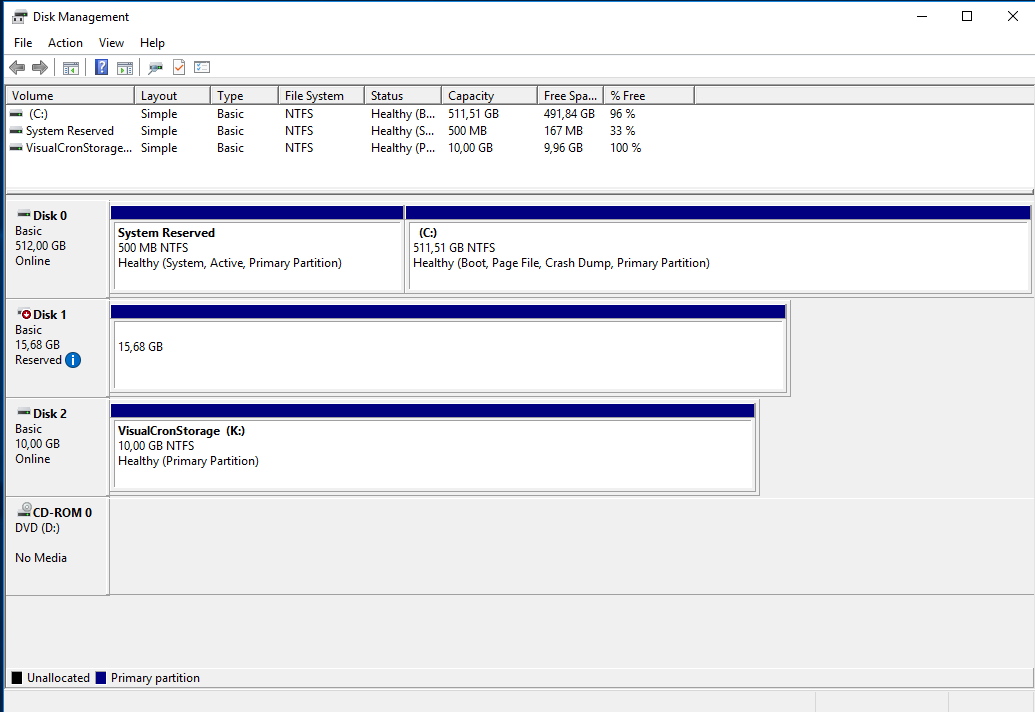
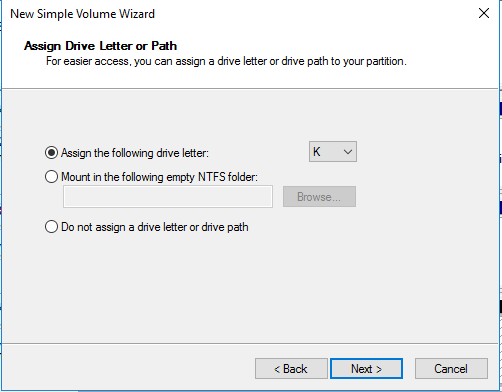
Select Create New Simple Volume. Leave the defaults in place. Choose a drive letter to assign.
ultj81uf9qztk7XT_QRDZVZYd1GPQW2c57MOcCF_EkXQbOpDbojiMdrwIAlJ_URywhlMKziMQESm81x4k8iyJwHknzHUuePNeG5OU5vI7bq0UvjeJyjsmhve4RJyxPtOLgA0wYrh

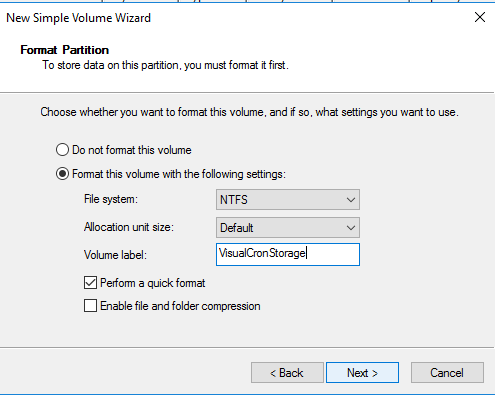
Label your drive f.ex.  as VisualCronStorage
pKZnuUT2wT85J-TxvhjQsMFOX9aVlgP4kuURdXhcp4JgdF6Vl_KoOFyMYoU6YG5o_Okg2V1f1vjAkfqxBBqvX-pXw_irXiKqrDykhiAhjg7GR1vTU3QRRtS9RqacJI0eLtkI5pk6

Click Next.

Szt9FUcvYENHyJ3fG4t136IL9YaAZXvJR1-yfEriNpCluJ8ukil4cHJjoVAMvXx-DT8rtGeqwRLcndylpvKAzti6OPFcmwK6M-1anVhTENh0eKkBC4lTwTwyN_wO5oO_PGfjvAe7


Once this is done for your first node, repeat these steps on your additional nodes. you must connect the iSCSI drives on both systems before they will be available for your cluster.


As the simple volume is now configured, you only need to initialise the disks on the other Nodes, not recreate the Volume. Shared drive should have the same disk letters on both nodes.